How to register and use Ninox Drone 2 (complete guide 2026)

Rune Millerjord
Photographer
Jun 17, 2026

How to register and use Ninox Drone 2 (complete guide 2026)
The old Ninox app is gone. If you want to register your flights from now on, Ninox Drone 2 is the one that applies, and you must create a new user and register again, even if you used the previous app.
I have just gone through the process myself: creating a user, two-factor authentication with an authenticator, uploading the certificate, and entering the first flight. Most of it went fine, but a couple of minor things crop up along the way that are good to know about so you can get this done as quickly and easily as possible.
Quick note: I did this on an iPhone and registered as an operator. On Android, things might look a bit different.
What you need before you start
Here is how to set up Ninox Drone 2 from scratch. You need two things ready before you start:
An authenticator app on your phone (Google Authenticator, Microsoft Authenticator, or equivalent). You must use it during registration to set up the two-factor authentication.
Your drone certificate available. You will need the Registration Number (Verification Number) from the certificate during registration.
The process takes about 15–20 minutes. There are two minor things that can halt your progress. Both solutions are gathered in the Tips section at the bottom.
Create a user in Ninox Drone 2
You create your user in the app. Download Ninox Drone 2 from the App Store, open the app, and choose to create a new user.
You will be asked to fill in your name, email, phone number, and password. So far, this went fine.
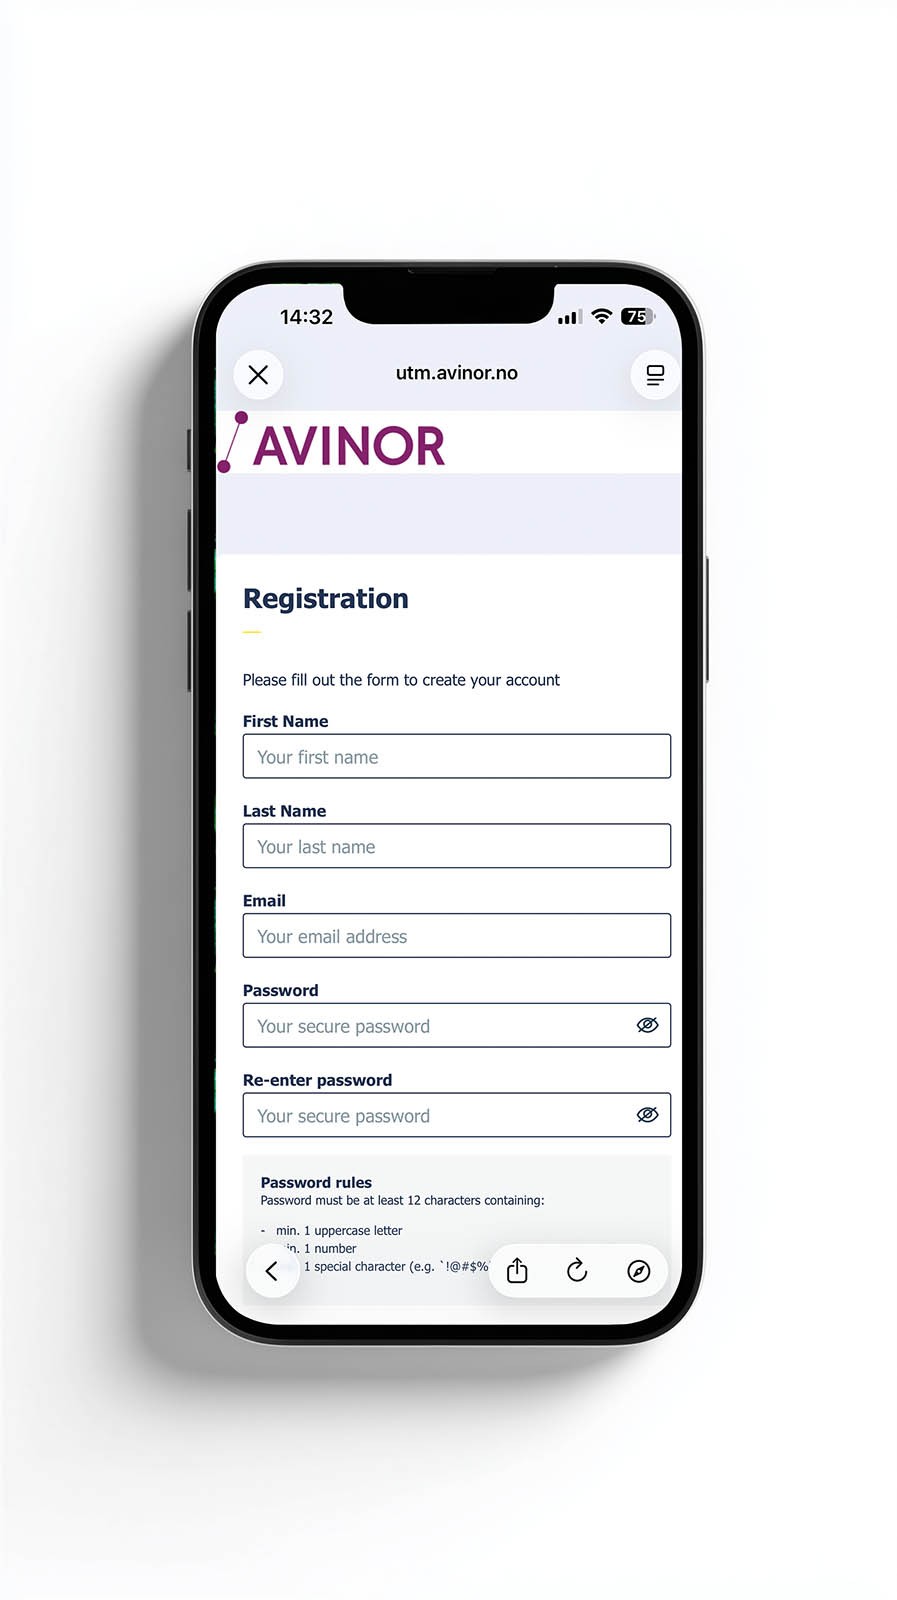
Some people wonder what they should choose when it comes to the choice between operator and pilot. The difference is: the operator is the person responsible for the drone operation—for most who fly privately or on small assignments, that is you. The pilot is the person who actually flies the drone in the air. If you are both, which is the case for most solo pilots, choose operator. Then you fill both roles.
Two-factor with an authenticator app
After the user is created, you must set up two-factor authentication before you can log in.
On the screen, you will see a QR code. Open the authenticator app on your phone, tap the plus symbol to add a new account, and scan the code.
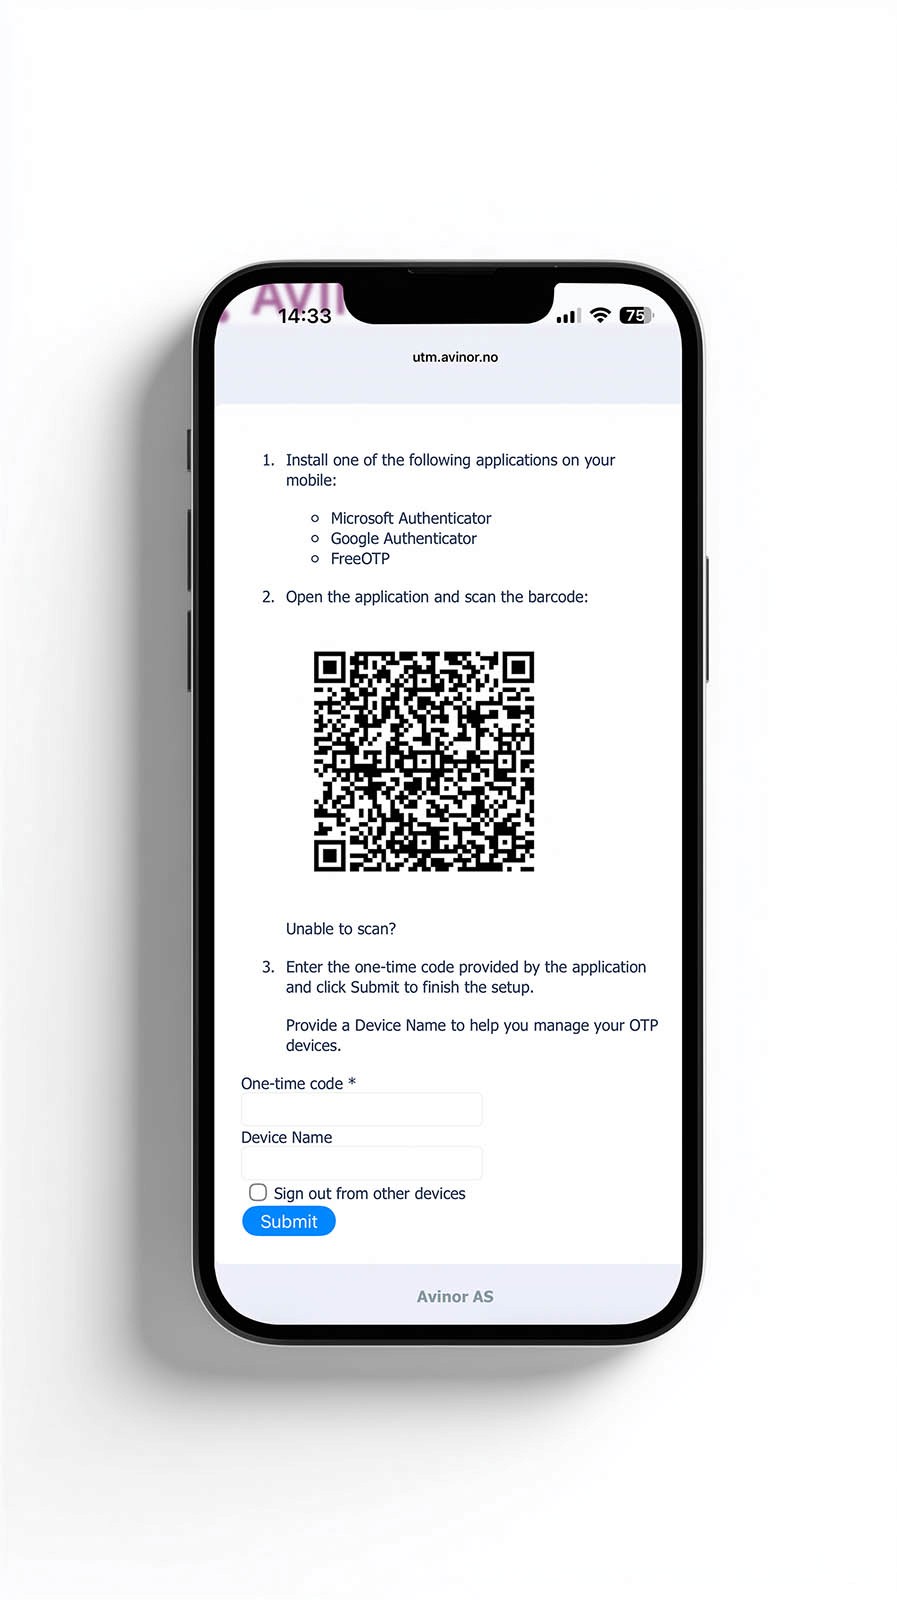
The authenticator app will now give you a six-digit code that changes every 30 seconds. Enter the active code in the app to confirm the setup. From now on, you must get this code every time you log in.
How to enter a flight in Ninox Drone 2
Once you are logged in, you should register your flight in the app. Here is how you do it:
Tap the location where you plan to fly on the map. A blue symbol appears to mark the position you have chosen.
Select the area type. You can choose between Circular, Path, or Area to define the area you plan to fly in. I mostly use Circular, which gives a radius ring around your starting point.
Tap Create flight plan. This will take you to the actual form where you fill in the details of the flight.
Fill in contact info/"Contact details": first name, last name, email, and phone number.
Fill in the operational details/"Operation plan details":
Start date and time and End date and time: when your flight starts and ends.
Maximum takeoff mass (g): the weight of your drone in grams.
Max altitude (m): how high you plan to fly. Remember that the maximum legal height for most drone operations is 120 meters.
Type of operation: VLOS (Visual Line of Sight) is what most people choose and means that you have the drone in your line of sight at all times. BLOS requires special certificates and is not relevant for ordinary hobby flying.
Drone: here you select the drone you have registered in the system.
Public title: a brief description of what you are going to do. I mostly use something simple like "Nature Photography" or "Recreational flight".
Check the summary. When everything is filled in, a summary will appear where you can double-check the details.
Send the flight plan by tapping the small purple paper airplane symbol.

Your flight is now entered into the system.
The flight is registered: now what?
Once you have tapped the paper airplane symbol, you will return to the map. Your flight plan is now under Operation plans & log with the status Proposed (orange). This means that the plan is registered, but not active yet.
When the start time you chose arrives, the status changes to Activated (green). From that moment, your flight is visible to others in the airspace, and you can fly within the area you have drawn.
What do Proposed, Activated, and Rejected mean?
In the overview of your flight plans, the color of the status tells you where you stand:
Orange (Proposed): the plan has been submitted and is waiting to be activated.
Green (Activated): the plan is active, and you can fly.
Red (Rejected): the plan has been rejected and cannot be carried out as registered.
What the app does not show you
A major change from the old Ninox app: Ninox Drone 2 shows you significantly less information than before. The new app mainly covers the 5 km zone around airports. The main point is that others in the airspace know and see that you are out flying.
This means that as a pilot, you must use other tools to get a full overview of the airspace you plan to fly in. As far as I know, SafeToFly is currently the best option for this.
Tips: two things that can stop you along the way
If you follow the guide step-by-step and experience problems along the way, see if these two tips can help you.
If the QR code is on the same phone
When you set up two-factor authentication, the QR code is displayed on the same phone you need to scan it with. What I did was take a screenshot of the QR code, send it to my computer, and scan it from the screen there with the authenticator app on my phone.
If the certificate will not upload in the app
When I was going to upload the image of the drone certificate in the app, it would not accept the file. Something related to "0 KB" appeared in the upload field, and the image was not accepted, even though it was sitting perfectly fine in my camera roll.
What I did was log in via the web browser instead. The upload went straight through there. Same user, same image, no problem. I was able to complete the rest of the registration without skipping any steps.
If you are stuck in the same way: log in to the Ninox Drone portal in your browser (utm.avinor.no/avm) and upload the certificate from there. It is the easiest way forward.
Now you are registered and ready. Good luck with your flight!