Where can I fly a drone in Norway? 3 steps before you take off (2025)

Rune Millerjord
Photographer (Commercial & Adventure)
Dec 18, 2025

Where can I fly drones in Norway? 3 steps before you take off (2025)
When I started flying drones, there was one thing that surprisingly took a lot of time: figuring out where I could actually fly. I had found several places that I thought were perfect for getting good pictures and videos. The challenge was that I felt it took an unreasonable amount of time to plan to get into the air. Additionally, one wondered, did I actually have "permission" to fly where I had planned? Was it a protected area I had overlooked?
The problem is that several authorities and actors set guidelines for where we can fly - Avinor, the Environmental Agency, NSM, the Civil Aviation Authority, and the information is spread across various websites and mapping services. It takes a while for this to sink in.
Why it feels messy
In Norway, the responsibility for airspace is divided among four different authorities, each with its own map and website. None of them communicate with each other. There is no single official place that gathers everything.
Authority | Responsibility | Map/tool |
Avinor | Airport zones (5 km radius) | |
The Environmental Agency | Protected areas | |
NSM | Sensor bans (defense facilities, etc.) | |
The Civil Aviation Authority | NOTAM (temporary restrictions) |
In practice, this means you have to check multiple places before you know if an area is free. One service shows airport zones, another shows national parks, a third shows military installations you are not allowed to film. And NOTAM, temporary restrictions can appear with 24 hours' notice.
Fortunately, there is one service that gathers most of it in one place. But you still need to know what you are looking at, and what to do when the map turns red.
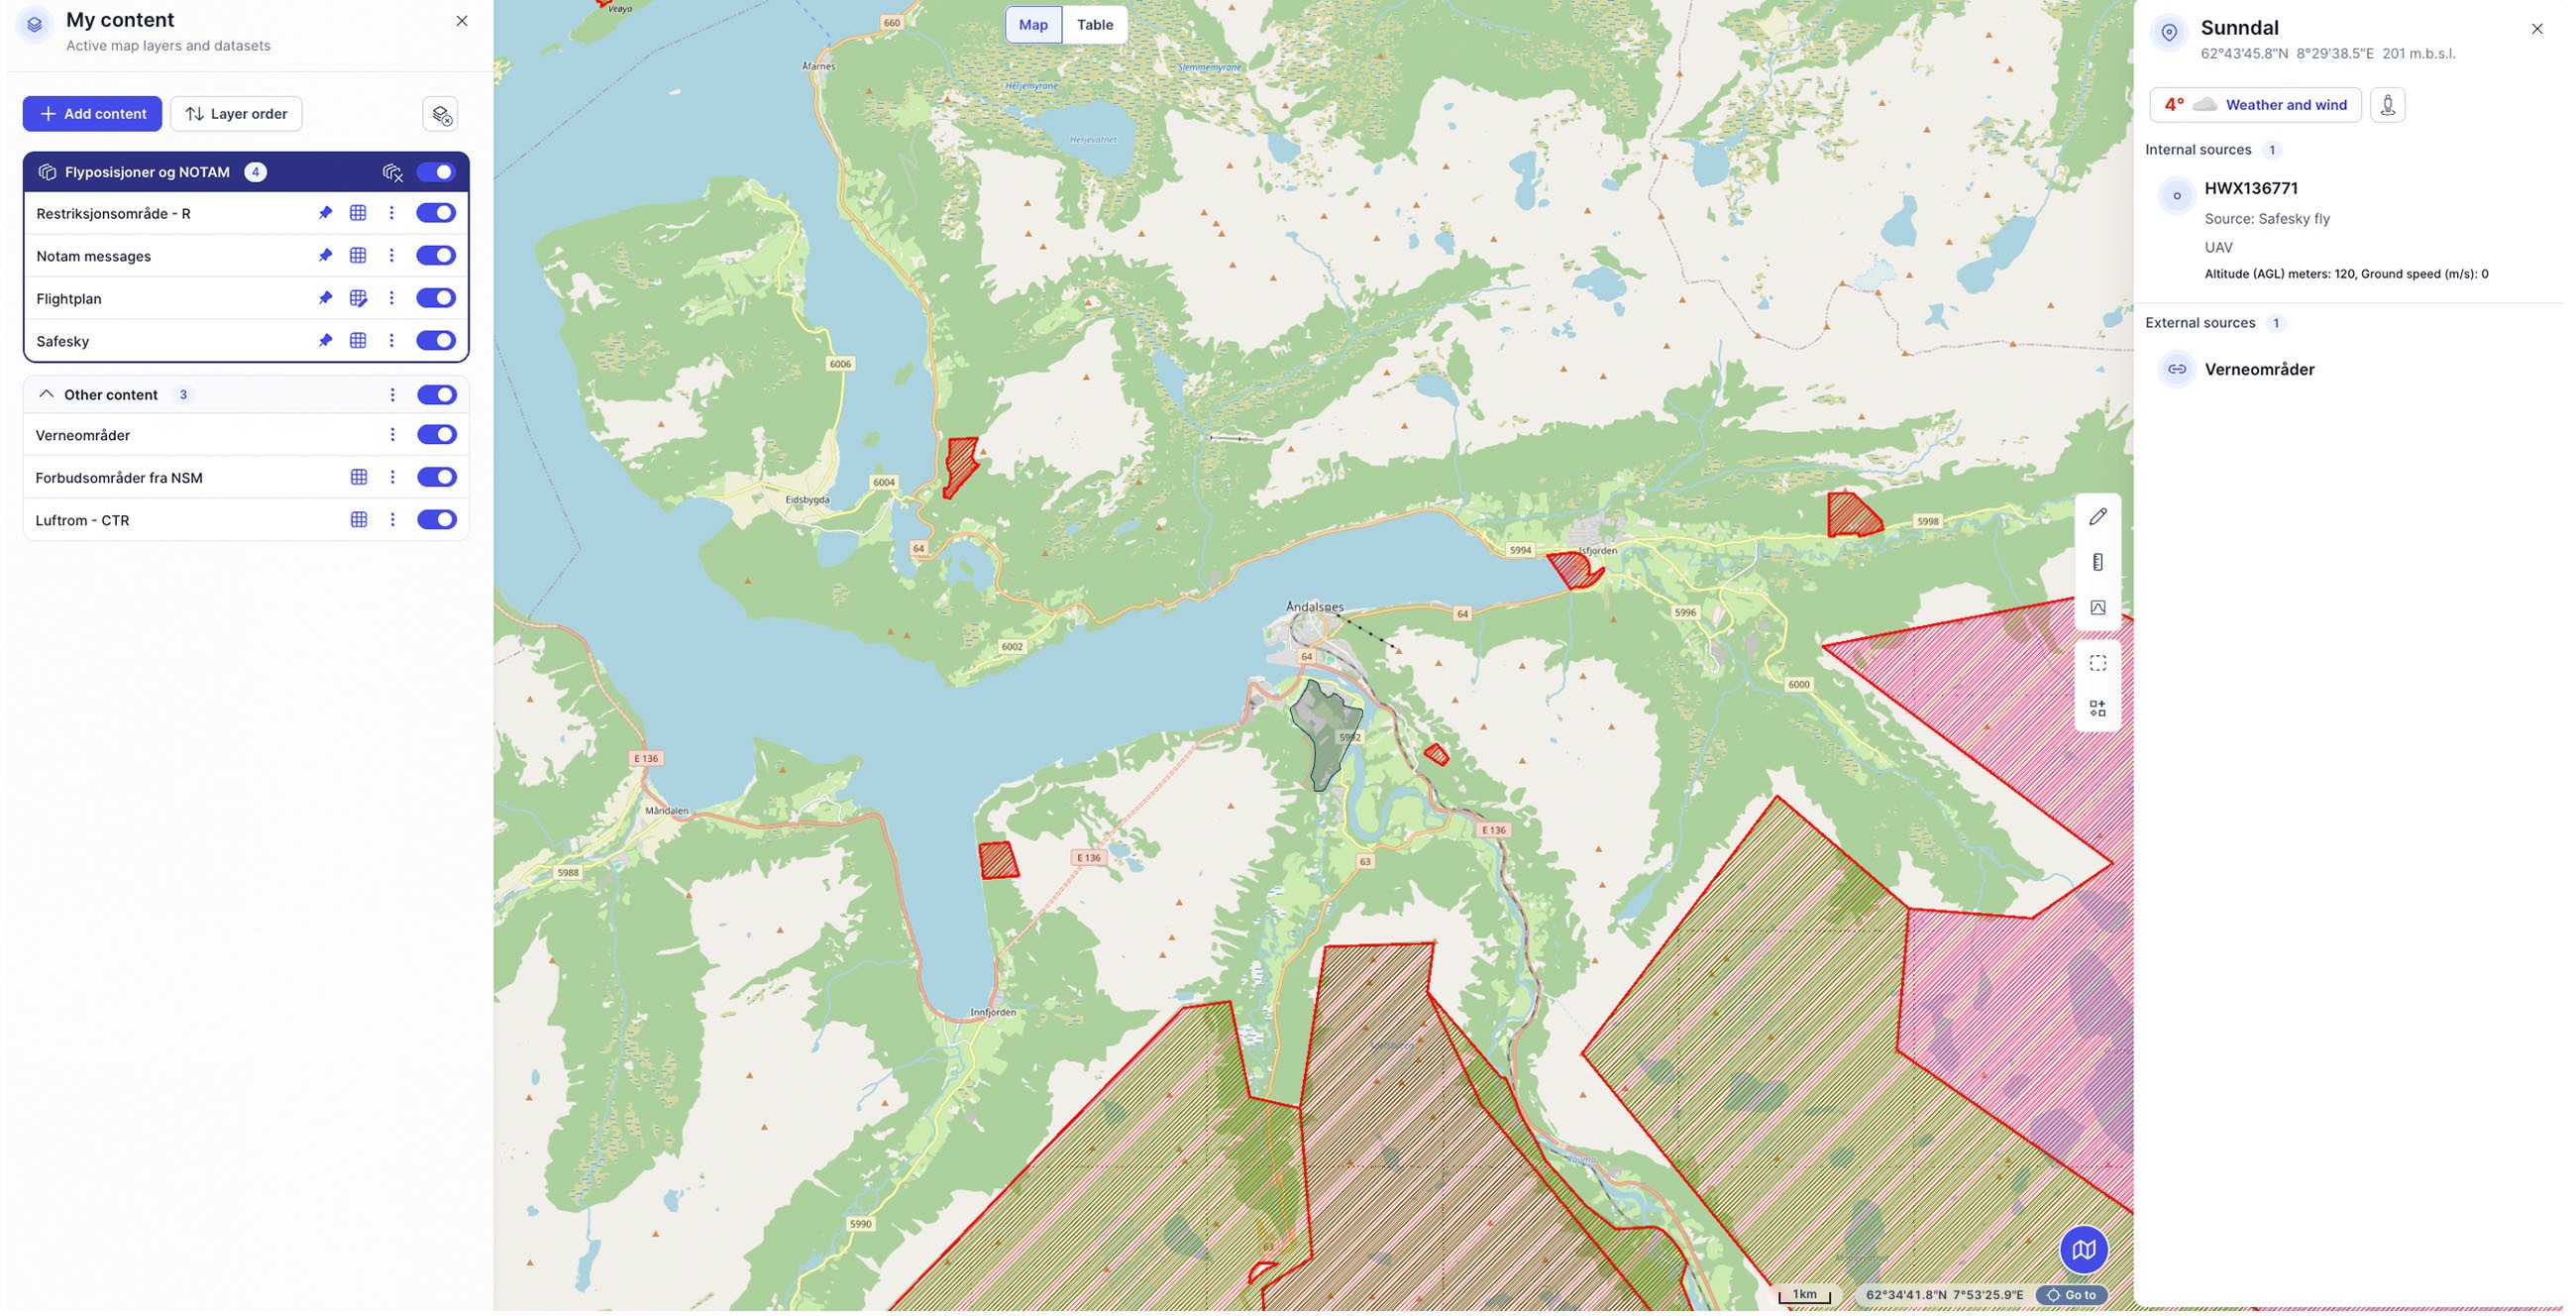
Step 1: Check SafeToFly.no
SafeToFly is the closest you get to a comprehensive overview of where you can fly drones in Norway. The service was developed by UAS Norway in collaboration with Asplan Viak, and gathers map layers from the four authorities. Airports, protected areas, NSM bans, NOTAM, and aviation obstacles in one interface.
This is my starting point every time I plan a flight.
The procedure is very simple: Open SafeToFly, find the location you intend to fly, and turn on the relevant map layers. If the area turns red, there are restrictions you must comply with. Green means the map shows no known restrictions there.
The map layers I have activated are:
NOTAM (temporary restrictions)
CTR (controlled airspace around airports)
Restricted areas
NSM bans
Protected areas
One important thing to remember: SafeToFly only shows the map. It does not give you permission to fly, and it is not an official source.
SafeToFly is free in a limited version. Full features require membership in UAS Norway.
Step 2: Make yourself visible with Ninox Drone
If SafeToFly shows that you are within 5 km of an airport, you must seek permission before you fly. You do this via Ninox Drone. But Ninox is about more than just permissions; it’s about being visible to everyone who shares the airspace with us.
When you submit a flight plan in Ninox, it becomes visible in HemsWX among others. It is the system used by air ambulances, police helicopters, rescue helicopters, and civil aviation in real-time. Then they can see where you are, and you become part of the shared picture of what is happening in the airspace.
The procedure is straightforward: Download the app, register, and enter your flight plan.
When you must use Ninox: Within 5 km of an airport—this is mandatory.
When you should use Ninox: Always. No matter where you fly.
Why this matters
Drones receive a lot of negative attention, and many view drone pilots with skepticism. This is not without reason. Some fly illegally, some fly recklessly, and it ruins things for all of us who take this seriously.
It takes 30 seconds. It costs nothing. And it shows that you are a serious actor who takes responsibility not only for your own safety but for everyone who shares the airspace.
A small note: Avidrone was planned to replace Ninox, but the launch has been postponed. Ninox will continue as the current solution for now. I will be writing a longer blog post about "Avidrone" when this solution becomes available for use.
Step 3: Check NOTAM on the flight day
NOTAM are temporary restrictions that can appear on short notice, military exercises, accidents, or larger events.
Check NOTAM on the same day you are flying. You can use SafeToFly or IPPC.no, the important thing is that the information is fresh. See if there is anything active in your area, and check position, radius, and altitude.
Your 2-minute checklist
Before you take off:
SafeToFly.no — Red or yellow in your area?
Near an airport? — Enter a flight plan in Ninox Drone
On flight day — Check NOTAM for active restrictions
Three steps, done. Happy flying.
Next steps
Would you like to understand the drone regulations in detail? Read What do the drone regulations in Norway really say? (Complete guide 2025).
Wondering what the C-marking on your drone means for where you can fly? Here is the guide: What do C0, C1, C2, C3 mean on your drone? (and where can you fly).