Drone checklist Norway 2026: From 4 agencies to takeoff in 5 minutes
Rune Millerjord
Photographer (Commercial & Adventure)
Jan 30, 2026

Drone Checklist Norway 2026: From 4 agencies to takeoff in 5 minutes
Many find that planning before flying their drone takes a lot of time. It did for us at first as well. Here is the simplest and fastest way we have found that allows you to plan and get airborne in 5 minutes.
The information Norwegian drone pilots need before takeoff is scattered among the Norwegian Civil Aviation Authority, Avinor, the National Security Authority, and the Environmental Agency. No one has gathered everything in one place – until now. (A big thanks to "Safetofly" and UAS Norway).
Here is the checklist we use ourselves, down to the three steps that are actually needed.
Why it feels chaotic
If you want to fly a drone legally in Norway, you must relate to information from four different agencies:
Norwegian Civil Aviation Authority – airspace, restricted areas, and NOTAM
Avinor – airport zones and permits
National Security Authority (NSM) – sensor prohibition areas
Environmental Agency – protected areas and national parks
Previously, this meant four different websites, four different mapping solutions, and a lot of scrolling back and forth. Today, there are better solutions.
What restrictions apply to you also depends on what C-marking your drone has. Unsure what the marking means? Read our guide to C0, C1, C2, and C3.
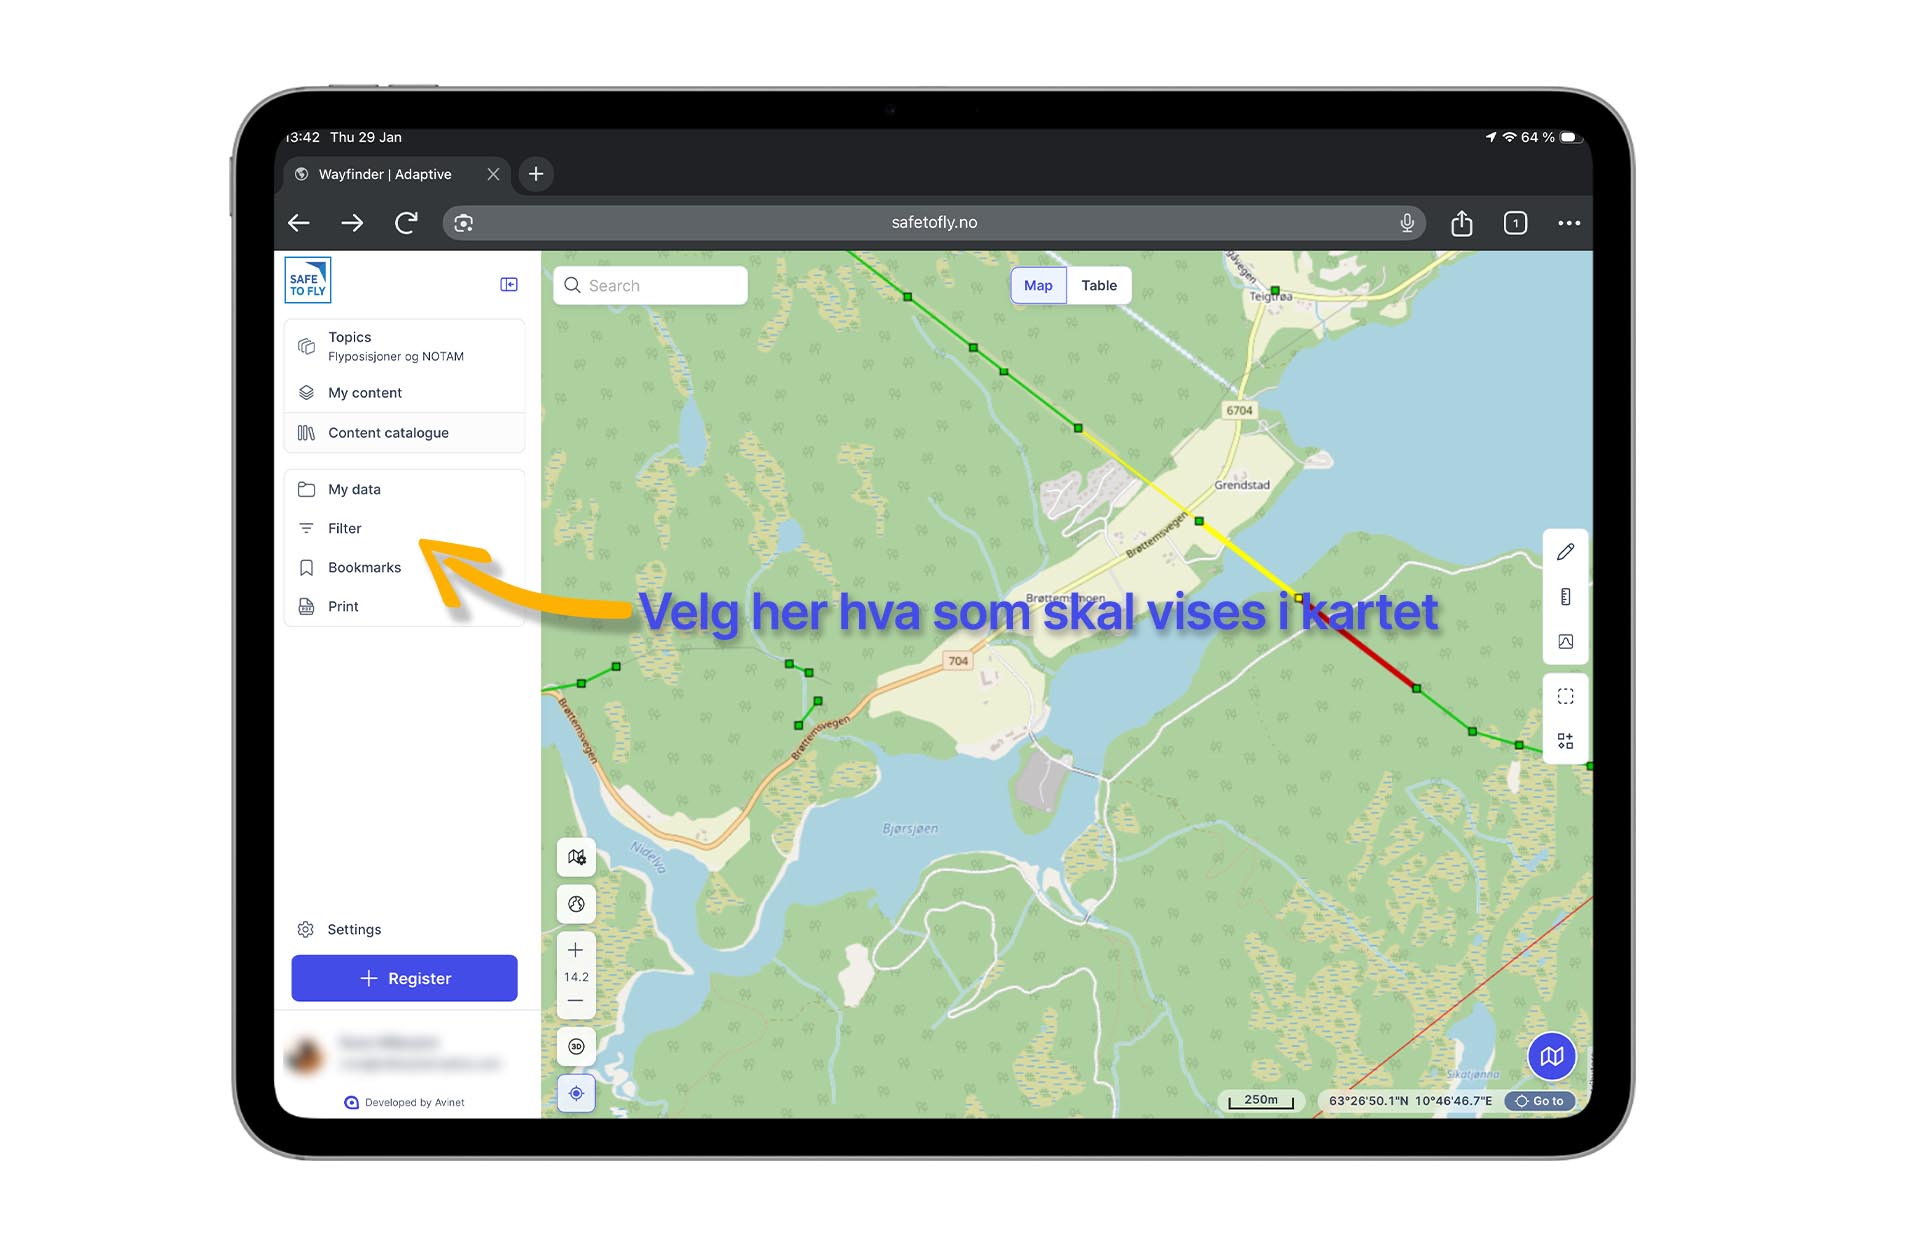
Step 1: SafeToFly.no
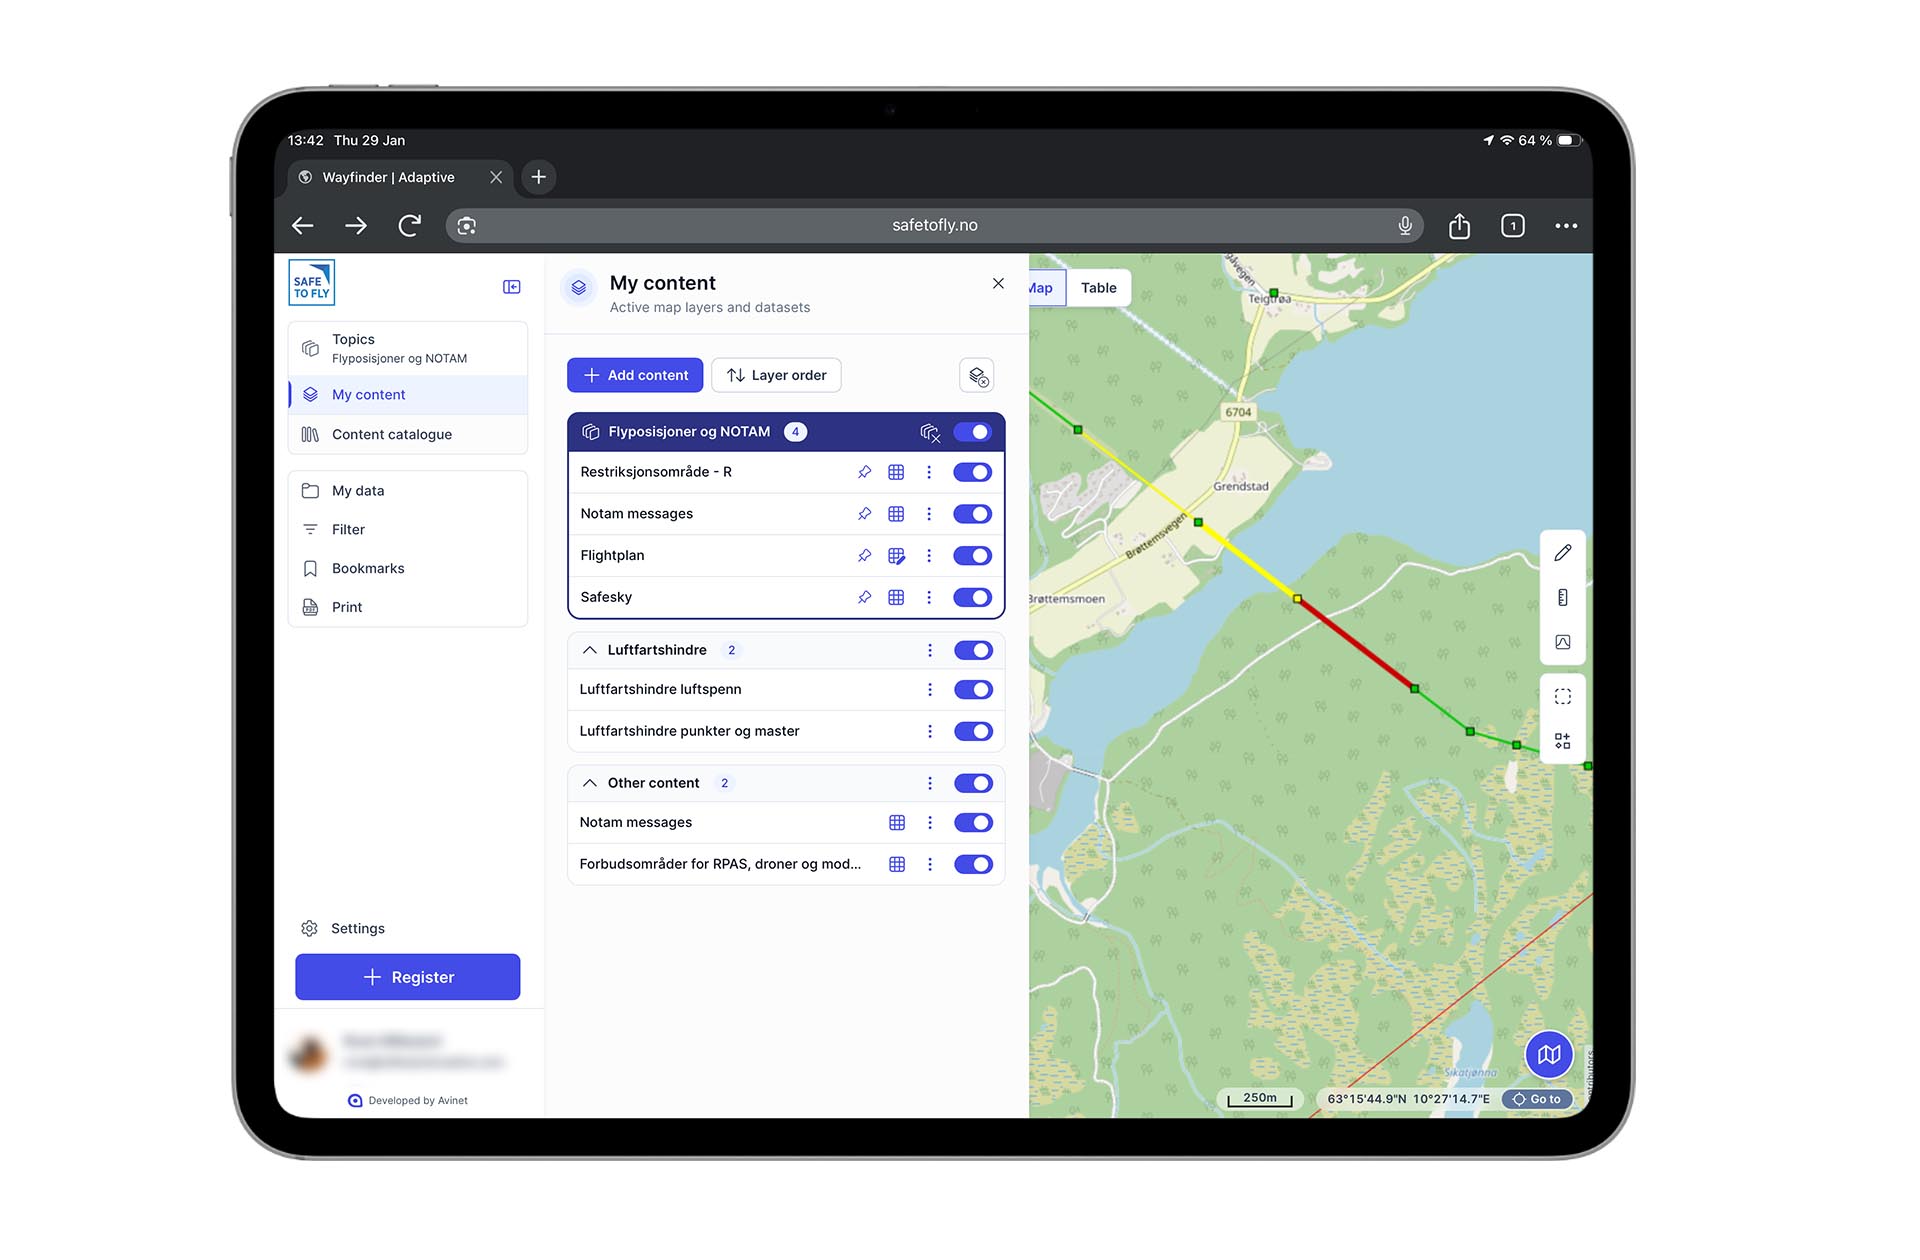
SafeToFly gathers map layers from all four agencies in one solution. Here you can turn on:
Protected areas (from the Environmental Agency)
Sensor prohibition areas (from NSM)
Airspace, CTR, and restricted areas
NOTAM (temporary restrictions)
Airports and helipads
Live air traffic (via SafeSky)
Weather data
Here’s how to do it:
Go to safetofly.no
Zoom in on the area you will fly
Click on “My content” and turn on relevant map layers
Assess if the area is free of restrictions
SafeToFly is free for everyone. Members of UAS Norway gain access to more map layers and features like bookmarks and personal settings.
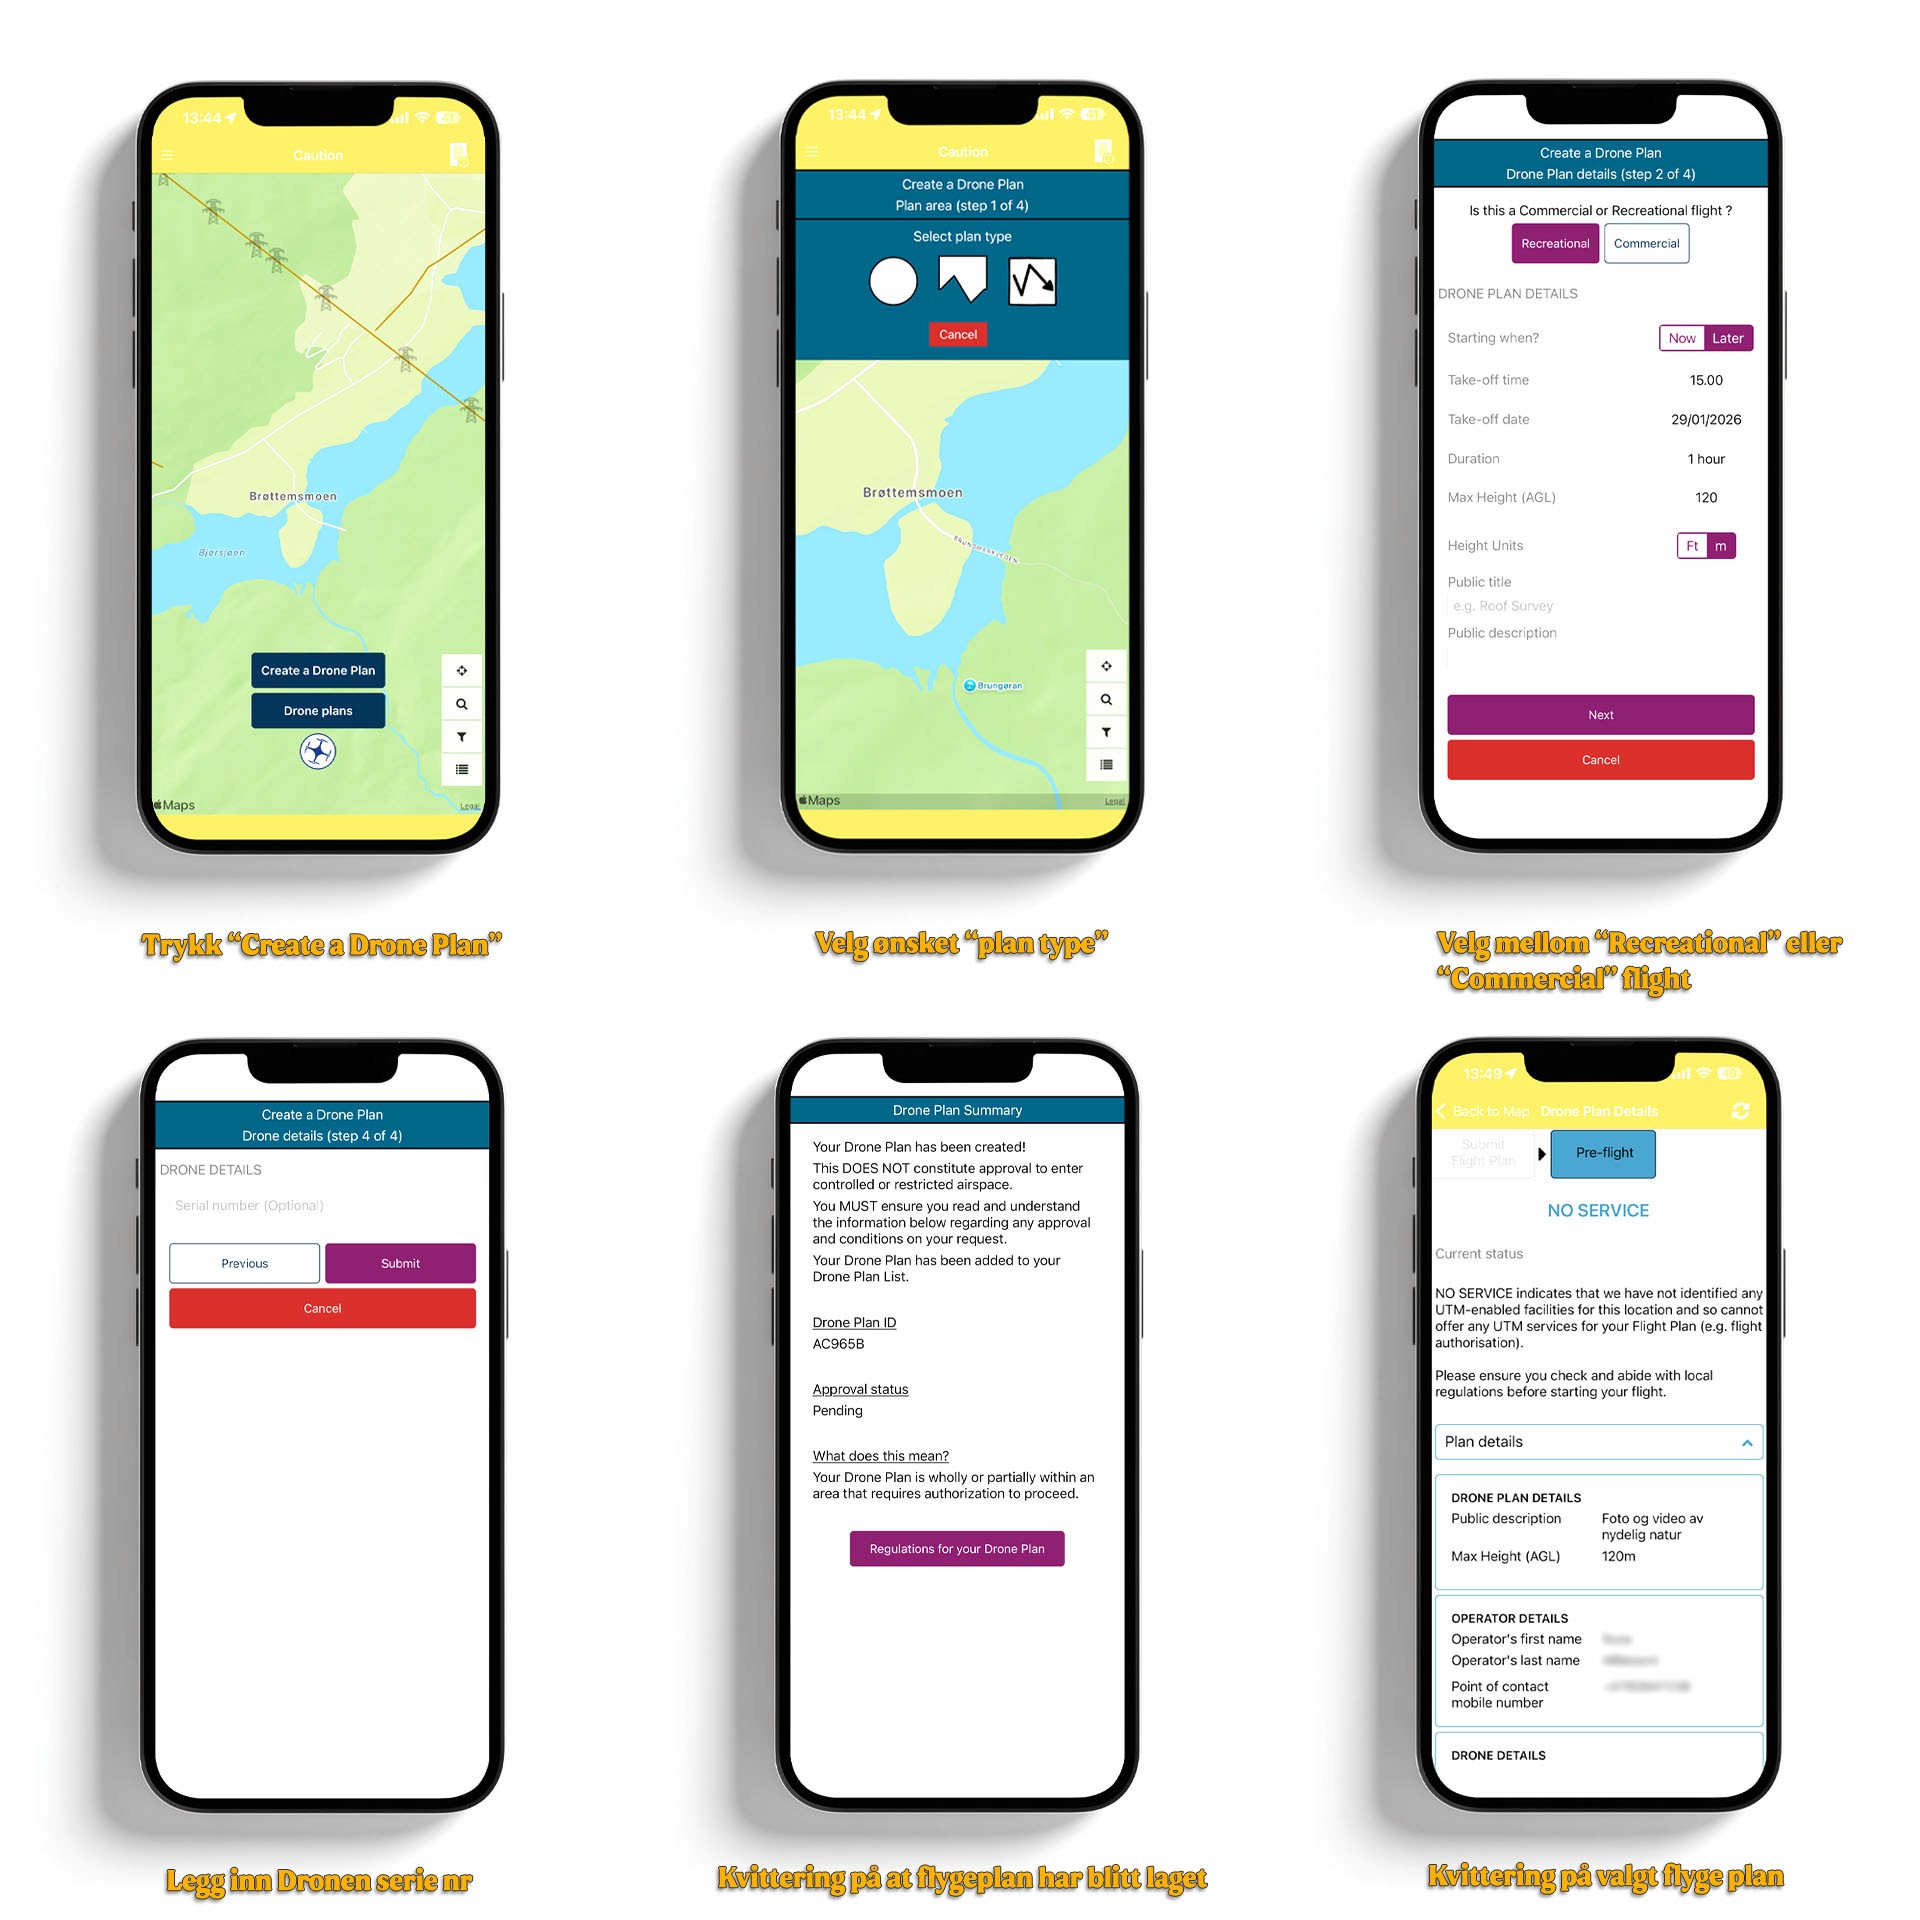
Step 2: Ninox Drone
Even though SafeToFly shows you where you can fly, you should always register your flight in Ninox – no matter where in the country you are.
When you register in Ninox, your flight becomes visible to air ambulances, police helicopters, and rescue helicopters via the HemsWX system. It’s about safety – for both you and those flying in the same airspace.
Here’s how to do it:
Open the Ninox Drone app
Draw the area you will fly
Fill in the time and contact information
Submit the flight plan
Flying within 5 km of an airport? Then use Ninox to request permission from the tower.
Step 3: NOTAM on the flight day
NOTAM (Notice to Airmen) are temporary restrictions that can appear at short notice, from military exercises to VIP visits.
SafeToFly displays NOTAM, but the official source is IPPC.no. For most pilots in the open category, SafeToFly is sufficient, but feel free to check on the actual flight day to be sure.
DJI has also removed its automatic geofencing. The drone no longer stops by itself at restricted zones – the responsibility lies with you. Read more about what the removal means for you.
Bonus: Have your drone certificate available
Most people you meet out there care little about you flying a drone, as long as you do it considerately. However, once in a while, you may encounter someone uncertain about the regulations or skeptical because they've seen in the media that "drones" have been spotted near airports, etc. In that case, it might be good to have your drone certificate available, not because you are obliged to show this, but should any issues arise, it is professional to be able to say that you have a certificate and have registered your flight.
The A2 certificate also gives you more freedom – you can fly closer to people and buildings than with just A1/A3. Here are 4 reasons why the A2 certificate is worth it.
The Norwegian systems for drone flying are still fragmented, but with SafeToFly and Ninox, you have what you need to get the drone quickly in the air safely.